Programming the receivers Auriga, Pavo and Aquila
Corresponding transmitters: Pyxis, Corvus en Libra. Please click on the captions icon to enable the subtitles (English, French, German or Dutch).
Aquarius: teach-in a transmitter in 10 simple steps
- Unscrew the enclosure of the radio receiver
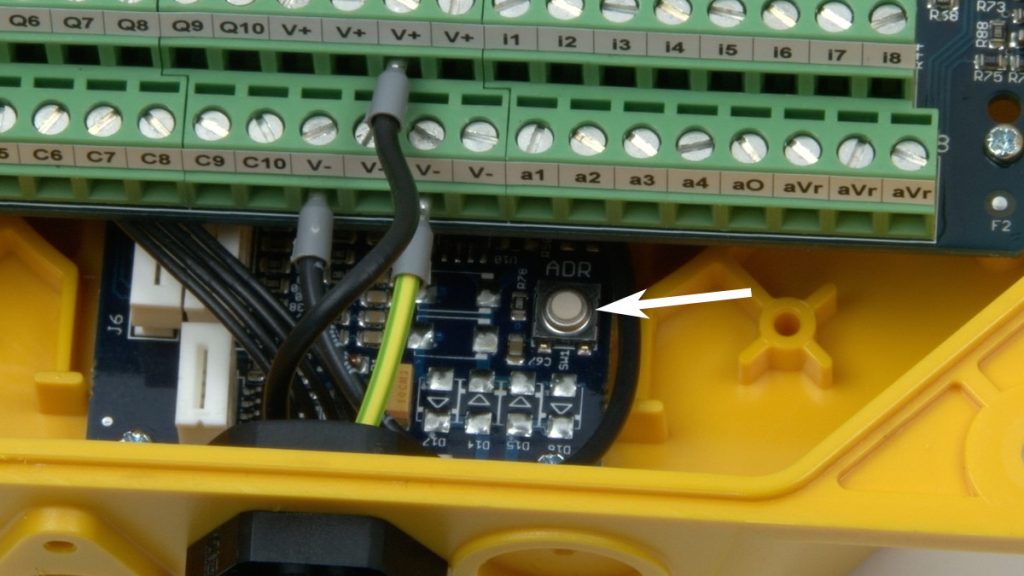
- You’ll see 2 PCB’s on top of each other
- Connect the ground wire to the V-
- Connect the powersource wire to the V+
- Press the white button on the bottom PCB, and keep it pressed
- Turn on the power
- Switch on the transmitter, and keep the ON-button pressed
- You will hear the relays click
- Release both buttons. Check if the transmitter has been programmed.
- Close the receiver enclosure and screw it tight. The system is ready for use.
- Repeat the above steps to teach-in multiple transmitters to the receiver.
- In order to erase all transmitters from the receiver, you repeat step 5 and 6 and keep the white button on the bottom PCB pressed for at least 10 seconds.
- After assembly, cut off and insulate all the unused wires.
- To optimize the range of the transmitter, it is recommended to place the antenna of the receiver as high as possible without obstructing metal objects.

